Methi Raita Flavored with Garlic is a flavorful, cooling, and slightly tangy yogurt-based dish that pairs perfectly with spicy Indian meals like biryanis, curries, and parathas. The bitterness of the methi (fenugreek) leaves is balanced out by the creamy yogurt, and the garlic adds a delightful aromatic punch to the raita.
Here’s how to make Methi Raita Flavored with Garlic:
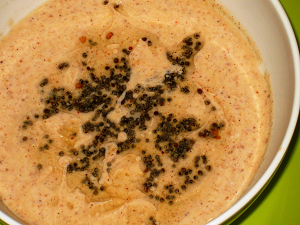
Methi Raita Flavoured With Garlic Recipe | What Is The Recipe Of Methi Raita Flavoured With Garlic
Ingredients
- 1 cup Fenugreek Leaves Methi , fresh and finely chopped
- 1 cup Yogurt Curd , whisked
- 1 tablespoon Cooking oil
- 4 Garlic chopped
- 1 Green Chilli chopped
- 1/2 Onion chopped
- Salt to taste
- 1/2 tablespoon Sugar
- 1/2 tablespoon Cumin powder
- 1/2 tablespoon Chaat Masala Powder
- Black Salt Kala Namak , to taste
- Water as required
- 1 tablespoon Cooking oil
- 2 Garlic chopped
- 1/4 tablespoon Kashmiri red chilli powder
Instructions
-
To begin making the Methi Raita With Garlic recipe, heat 1 tablespoon oil in a pan. Add cumin seeds and let it crackle.
-
Once it crackles, add chopped garlic and saute till they turn golden in colour and the raw aroma of garlic goes away.
-
Add green chilli, onion and saute it on medium heat until golden brown in colour.
-
Add chopped methi and saute it on high flame.
-
Now add salt to taste, cook it on medium high flame and cook without covering the lid.
-
Once methi is cooked, turn off the heat and keep it aside to cool it down.
-
Now take whisked yogurt in a bowl, add sugar and mix it well.
-
Add cumin powder, chaat masala, black salt (before adding black salt, keep in mind that we have already added some salt in methi onion mixture) and cooked methi onion mixture.
-
Add some water to adjust consistency.
-
Mix everything well and taste seasoning. You can adjust it according to your taste.
-
The next step is to temper the raita, heat the required oil in a tadka pan.
-
Add chopped garlic and saute till golden brown. Add red chilli powder and pour the tempering over Raita. Methi Raita is ready to serve.
-
Serve Methi Raita With Garlic along with Rajasthani Gatte Ki Sabzi and Phulkas for a weekday meal.
Tips:
- Blanching Methi: If you find the methi too bitter, blanching or sautéing the leaves before adding them to the yogurt can help reduce bitterness. Alternatively, you can use methi powder as a substitute for fresh leaves if you don’t have access to them.
- Vegan Version: To make this a vegan dish, you can substitute the yogurt with dairy-free yogurt (such as coconut or almond yogurt). Just be sure to adjust the seasoning since plant-based yogurts vary in flavor.
- Additions: For an extra depth of flavor, you can also add green chilies or grated ginger to the tempering. If you want a slightly creamier raita, add a tablespoon of cream or mayonnaise to the yogurt.
- Spice Level: Adjust the red chili powder and garlic quantity according to your heat preference. You can also add a pinch of black pepper for an extra kick.
Serving Suggestions:
- As a Side: This Methi Raita goes wonderfully with biryani, pulao, parathas, or naan. It’s a great cooling side to balance out the heat from spicy main dishes.
- With Grilled Foods: It also pairs well with grilled meats, paneer tikka, or kebabs, as the creaminess of the raita complements the smoky flavors of grilled dishes.
- In Wraps or Sandwiches: Use it as a filling for wraps or sandwiches to add a refreshing contrast to spicy fillings.
Methi Raita Flavored with Garlic is a fantastic way to enjoy the benefits of methi while adding a deliciously aromatic twist with garlic. The creamy texture, combined with the slight bitterness of the methi and the punch from garlic, makes this raita a delightful and refreshing addition to any meal. Enjoy! 🌿🧄🥄